Not all audio files are created equal. The format you choose affects everything from sound quality and file size to compatibility and whether you can edit the file later without degradation. Yet most people choose audio formats by default; whatever their device spits out, whatever Spotify downloads, whatever seems to work. Understanding the difference between lossy and lossless compression, and knowing which format suits which purpose, is fundamental knowledge for anyone working with sound. Here’s a clear breakdown of the four most important audio formats. MP3: The Universal Compromise The MP3 format (MPEG Audio Layer III), developed by the Fraunhofer Institute in Germany during the early 1990s, revolutionized how the world consumes music. It works by removing audio data that the human ear is least likely to perceive, a process called psychoacoustic compression. At 128kbps, an MP3 file is roughly one-tenth the size of an equivalent WAV file. At higher bitrates (256–320kbps), MP3 quality approaches near-transparent listening for most people. A 2014 study by researchers at the Harman International acoustics lab found that trained listeners could only reliably distinguish 320kbps MP3 from lossless audio about 52% of the time, which is essentially random chance. Best for: streaming, portable music playback, podcasts, and any situation where file size matters more than archival quality. File size: approximately 1MB per minute at 128kbps; 2.4MB per minute at 320kbps. WAV: The Uncompressed Standard WAV (Waveform Audio File Format) stores audio as raw, uncompressed PCM data. What the microphone captures is exactly what the file contains; no data is removed, no compression is applied. This makes WAV the standard working format in professional audio production, from recording studios to film post-production. The trade-off is size. A standard CD-quality WAV file (44.1kHz, 16-bit stereo) consumes approximately 10MB per minute. High-resolution recordings at 96kHz/24-bit can exceed 30MB per minute. Storage is cheap, but transferring large WAV files over email or streaming services remains impractical. WAV files also have limited metadata support; you can’t embed album art, lyrics, or extensive track information the way you can with MP3 or FLAC. Best for: recording, editing, mixing, mastering; essentially, any stage of audio production where quality cannot be compromised. FLAC: Lossless With Smaller Files FLAC (Free Lossless Audio Codec) compresses audio without losing any data: like a ZIP file for sound. When you decompress a FLAC file, you get back the exact original audio, bit for bit. FLAC files are typically 50–70% the size of equivalent WAV files, making them significantly more storage-efficient while maintaining identical audio quality. FLAC supports high-resolution audio (up to 32-bit/655kHz), embedded metadata, and album art. It’s the preferred format for digital music archiving and audiophile distribution. Services like Tidal, Qobuz, and Amazon Music HD use FLAC or equivalent lossless formats for their highest-quality streaming tiers. The main limitation is compatibility. While Android devices and most desktop software support FLAC natively, Apple’s ecosystem (iTunes, iPhone, HomePod) does not; Apple uses its own lossless format, ALAC, instead. Best for: music archiving, audiophile listening, long-term storage where quality preservation matters. AAC: The Modern MP3 Alternative AAC (Advanced Audio Coding) is the successor to MP3, developed as part of the MPEG-4 standard. At the same bitrate, AAC generally delivers better audio quality than MP3, particularly at lower bitrates below 192kbps. Apple adopted AAC as the default format for iTunes, Apple Music, and all iOS devices. AAC at 256kbps (the Apple Music standard) is widely considered transparent, indistinguishable from lossless audio in normal listening conditions. YouTube, Spotify (on mobile), and most modern streaming platforms also use AAC internally. Best for: Apple ecosystem, streaming, mobile devices, and general listening where broad compatibility with modern platforms is needed. Quick Comparison At a glance: MP3 at 320kbps runs about 2.4MB/min with good quality and universal compatibility. WAV at 44.1/16 runs about 10MB/min with perfect quality and is the editing standard. FLAC at 44.1/16 runs about 5–7MB/min with perfect quality and is ideal for archiving. AAC at 256kbps runs about 2MB/min with very good quality and is the modern streaming standard. Which Should You Use? Record and edit in WAV. Archive your masters in FLAC. Distribute and stream in MP3 (320kbps) or AAC (256kbps). This workflow preserves maximum quality at every stage while keeping distribution files practical. If storage isn’t a concern and you want one format for everything, FLAC gives you lossless quality with reasonable file sizes and rich metadata support.
Mobile Phone Recording for Content Creators: A Complete Guide
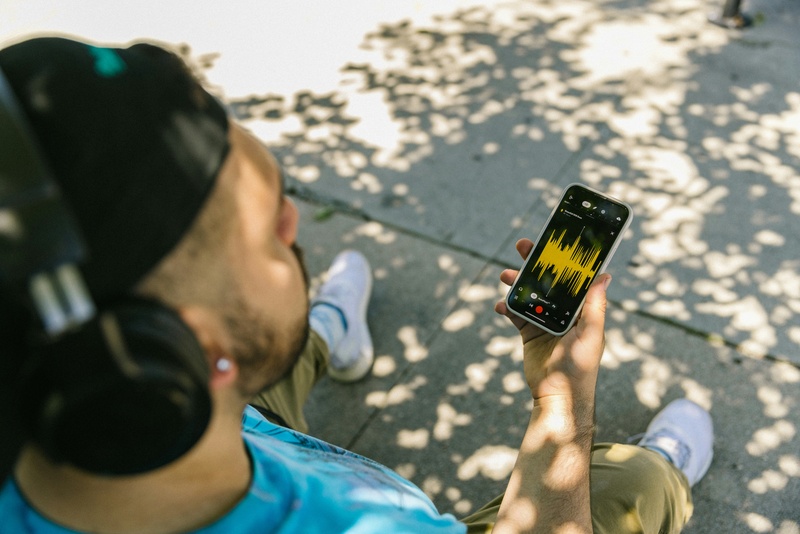
Mobile phone recording for content creators has become a cornerstone of social media, YouTube, and online marketing. Smartphones now offer powerful cameras and video capabilities that rival traditional equipment. For Turkish content creators, mastering mobile phone video recording can dramatically improve the quality of your content, grow your audience, and streamline your production workflow. Whether you are a beginner vlogger, social media influencer, or professional content creator, knowing how to maximize your smartphone’s recording potential is essential. This article dives into practical techniques, recommended settings, and tips for recording videos with your phone to create professional-level content. Why Mobile Phone Recording Matters for Content Creators Accessibility and Convenience Smartphones are portable, lightweight, and always within reach, allowing creators to capture content on the go. Unlike bulky cameras, mobile phone recording for content creators enables spontaneous shoots and flexibility in different environments. Quality Has Reached Professional Standards Modern smartphones come with high-resolution cameras, advanced stabilization, HDR capabilities, and AI-enhanced features. This means content creators can achieve cinematic-quality footage without investing in expensive gear. Cost Efficiency Investing in a professional camera and accessories can be expensive. Mobile phone filming for creators offers a budget-friendly alternative that still delivers excellent results, making it ideal for Turkish creators starting their journey or producing content consistently. Essential Equipment for Mobile Phone Recording Tripods and Stabilizers A tripod stabilizes your phone, preventing shaky footage, which is crucial for professional-looking videos. For on-the-move recording, gimbals or handheld stabilizers provide smooth cinematic movements. External Microphones Audio quality is just as important as video. External microphones, such as lavalier or shotgun mics, significantly enhance sound clarity, reducing background noise and ensuring your voice or music comes through cleanly. Lighting Tools Natural light is often sufficient, but ring lights or LED panels provide consistent lighting, reducing shadows and enhancing video quality. Adjustable lights allow creators to maintain a professional look in indoor and low-light settings. Accessories to Enhance Creativity Lenses, portable reflectors, and phone grips can elevate your video content. Wide-angle or macro lenses expand creative possibilities, allowing content creators to experiment with different styles and perspectives. Best Smartphone Settings for Video Recording Resolution and Frame Rate For content creators, shooting in 4K provides high-quality results and flexibility in editing. Frame rates of 30 or 60 fps are common; higher frame rates allow smooth slow-motion effects. Stabilization Settings Most smartphones include digital or optical image stabilization. Enabling these settings helps reduce shake, especially during handheld shooting. Exposure and Focus Control Manual focus and exposure controls prevent automatic adjustments that may disrupt the look of your footage. Locking focus and adjusting exposure according to lighting conditions ensures consistent video quality. Audio Settings If your phone supports it, select high-quality audio recording or use external microphones. Reducing background noise and selecting the correct audio source can make your content stand out. How to Record Videos with Your Phone for Content Creation Planning Your Content Effective mobile phone recording starts with planning. Define your video objectives, storyboard key scenes, and choose suitable locations. Planning reduces wasted footage and simplifies editing. Shooting Techniques Use a mix of static shots, pans, and close-ups to create dynamic videos. Experiment with angles to add variety and maintain viewer interest. Always check framing and composition to make your videos visually appealing. Utilizing Natural Light Whenever possible, shoot during golden hours — early morning or late afternoon — to achieve soft and flattering light. Avoid harsh midday sunlight, which can create unflattering shadows. Leveraging Smartphone Features Features such as slow-motion, time-lapse, portrait mode, and cinematic mode can add professional touches to your videos. Experimenting with these functions allows content creators to diversify their visual storytelling. Mobile Phone Filming Tips for YouTube and Social Media Keep It Short and Engaging Social media audiences prefer concise, attention-grabbing content. For platforms like Instagram, TikTok, or YouTube Shorts, aim to deliver your message quickly while maintaining quality. Optimize Video Orientation Vertical videos are ideal for social media, while horizontal is preferred for YouTube. Understanding platform-specific requirements ensures your content looks professional. Consistent Branding Use consistent color grading, fonts, and visual style across your videos. Even subtle elements like background or lighting patterns can reinforce your brand identity. Audio and Music Integration Adding background music or sound effects can enhance engagement. Always ensure audio levels are balanced and do not overpower your voice or primary message. Editing Tips for Mobile Phone Videos Use Mobile Editing Apps Apps like Kinemaster, CapCut, or Adobe Premiere Rush allow creators to edit directly on their phones. You can trim clips, adjust color grading, add transitions, and layer music without transferring files to a computer. Maintain Video Quality Export videos in high resolution to avoid compression loss. Keeping the original frame rate and resolution preserves professional quality for social media platforms. Apply Subtle Effects Avoid excessive filters or effects that may distract viewers. Focus on enhancing clarity, color balance, and pacing to maintain a polished look. Common Mistakes to Avoid in Mobile Phone Recording Shaky Footage Handheld recording without stabilization leads to unprofessional-looking videos. Always use a tripod or gimbal when possible. Poor Lighting Recording in dark or unevenly lit environments can reduce video quality. Plan lighting carefully and adjust your phone settings accordingly. Ignoring Audio Quality Many content creators overlook sound, but poor audio can ruin an otherwise great video. Investing in a microphone and monitoring audio levels is essential. Overcomplicating the Shot Simplicity often works best. Avoid cluttered frames and focus on clear storytelling. Effective mobile phone recording relies on intentional composition rather than excessive effects. Advanced Techniques for Content Creators Multi-Camera Recording Some creators use multiple phones to capture different angles simultaneously. This technique adds depth and versatility to video content without needing expensive equipment. Slow Motion and Time-Lapse These techniques allow creators to emphasize action or showcase processes creatively. Understanding when and how to use these features elevates video quality. Green Screen and AR Effects Advanced smartphone features now support virtual backgrounds and augmented reality overlays. Content creators can experiment with these tools for
